Insect Safari
21st August 2016
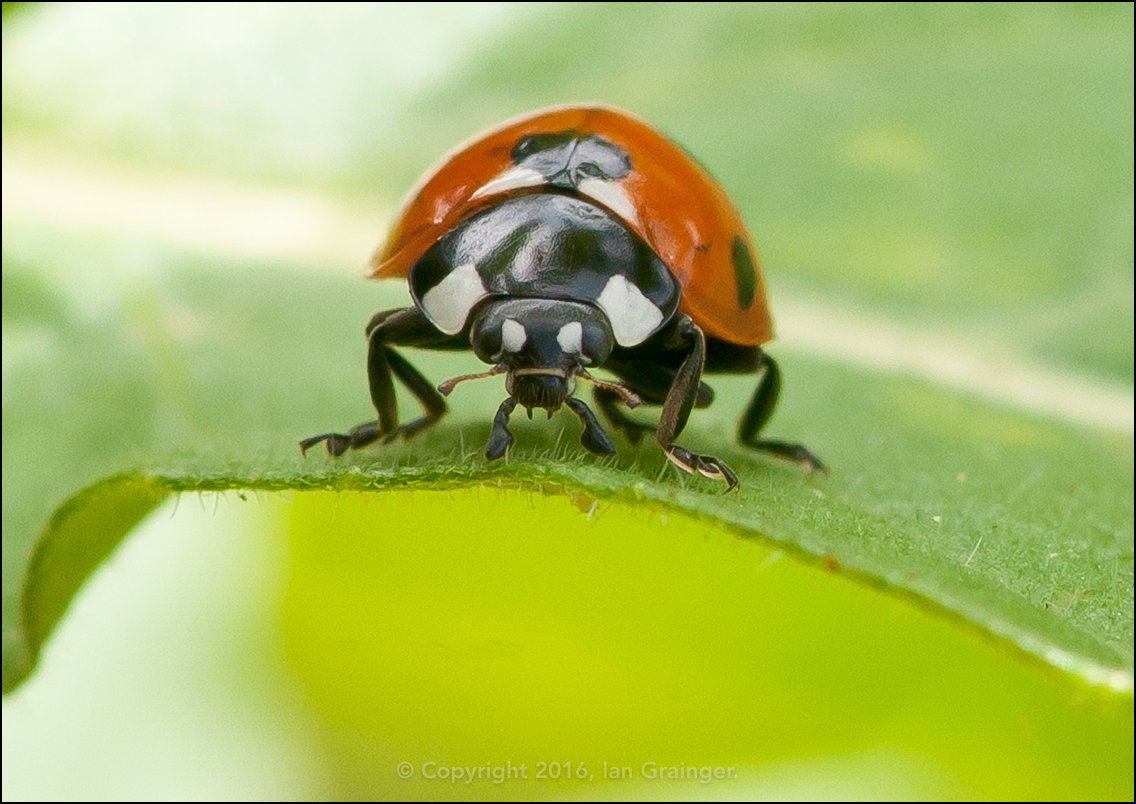
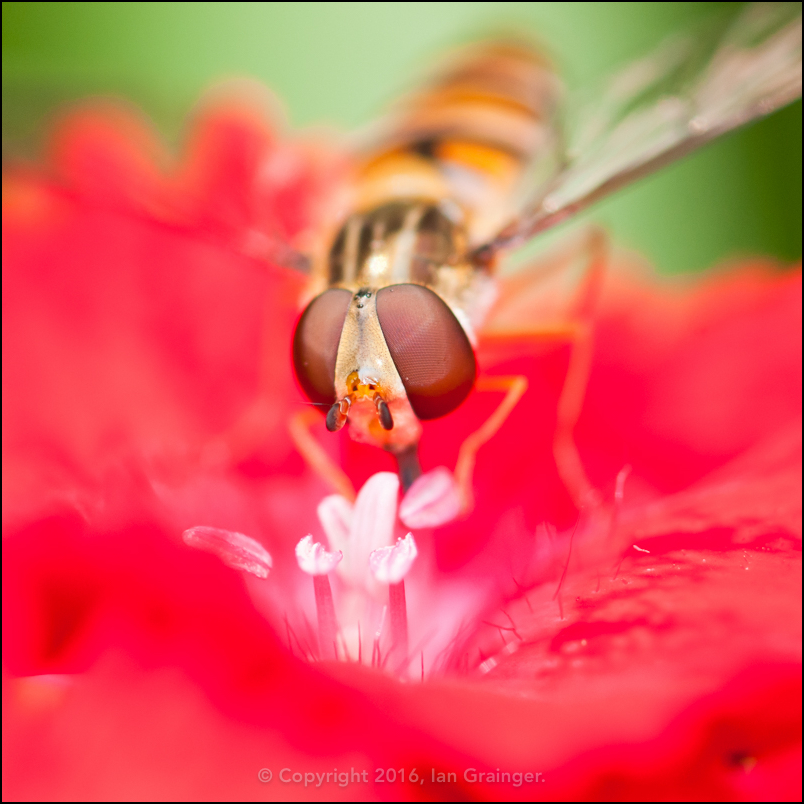
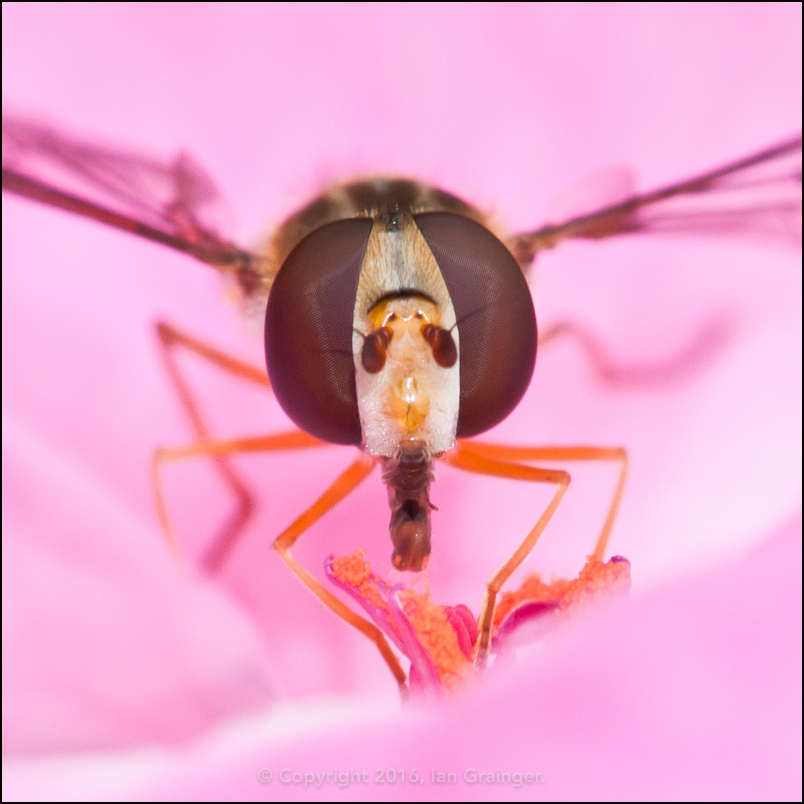
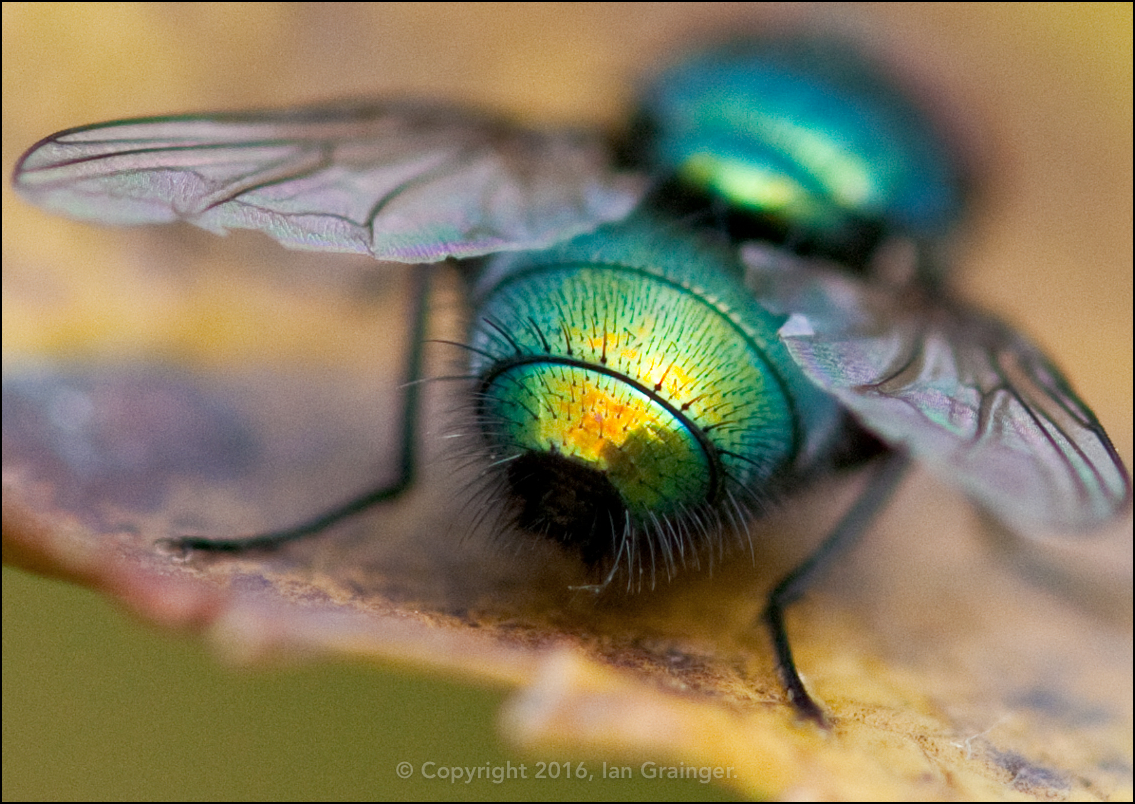
I wonder what he's up to?
Introduction
I've been asked quite a few times about how I shoot my insect macros, and have explained more than once or twice in various forums. However, now that I have a location to put all of my photography related information, namely here, I thought I'd collate the information and create a tutorial, based upon my own experiences! So, here goes...
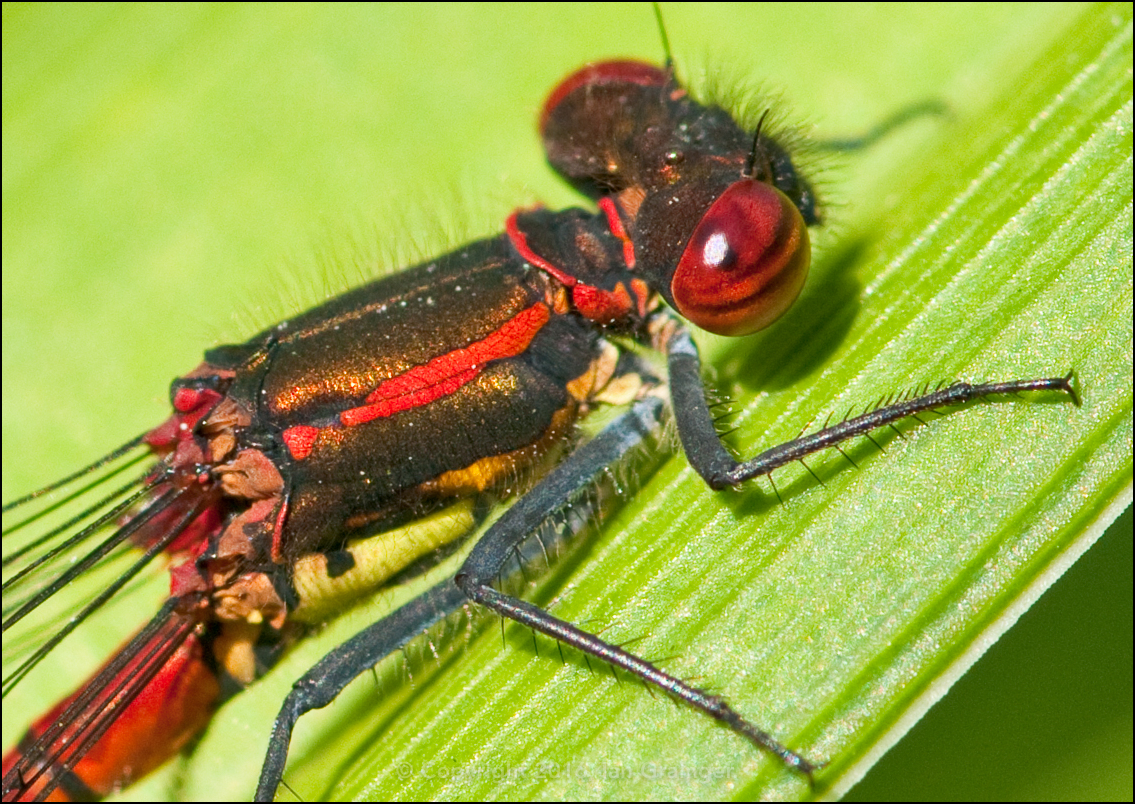
Can you pass the sun lotion please?
Locating Your Prey
The first thing you've got to consider is the subject! If you haven't got a model, you can't even begin!
Anyone who's tried swatting a fly knows how quickly they can move, and how spooked they get as you get closer. Sneaking up on them is very difficult, but not impossible.
As insects are cold blooded, it takes time for them to warm up on a morning. So, ideally, the morning is the best time to approach them, whilst their energy reserves are low, and their movement is sluggish.
As the sun comes up and starts warming the air, you can normally find all sorts of insects at rest on plants, bushes and flowers. Take a close look and you can normally find quite a few sitting as bold as brass on attractive flower petals on bright cold mornings.
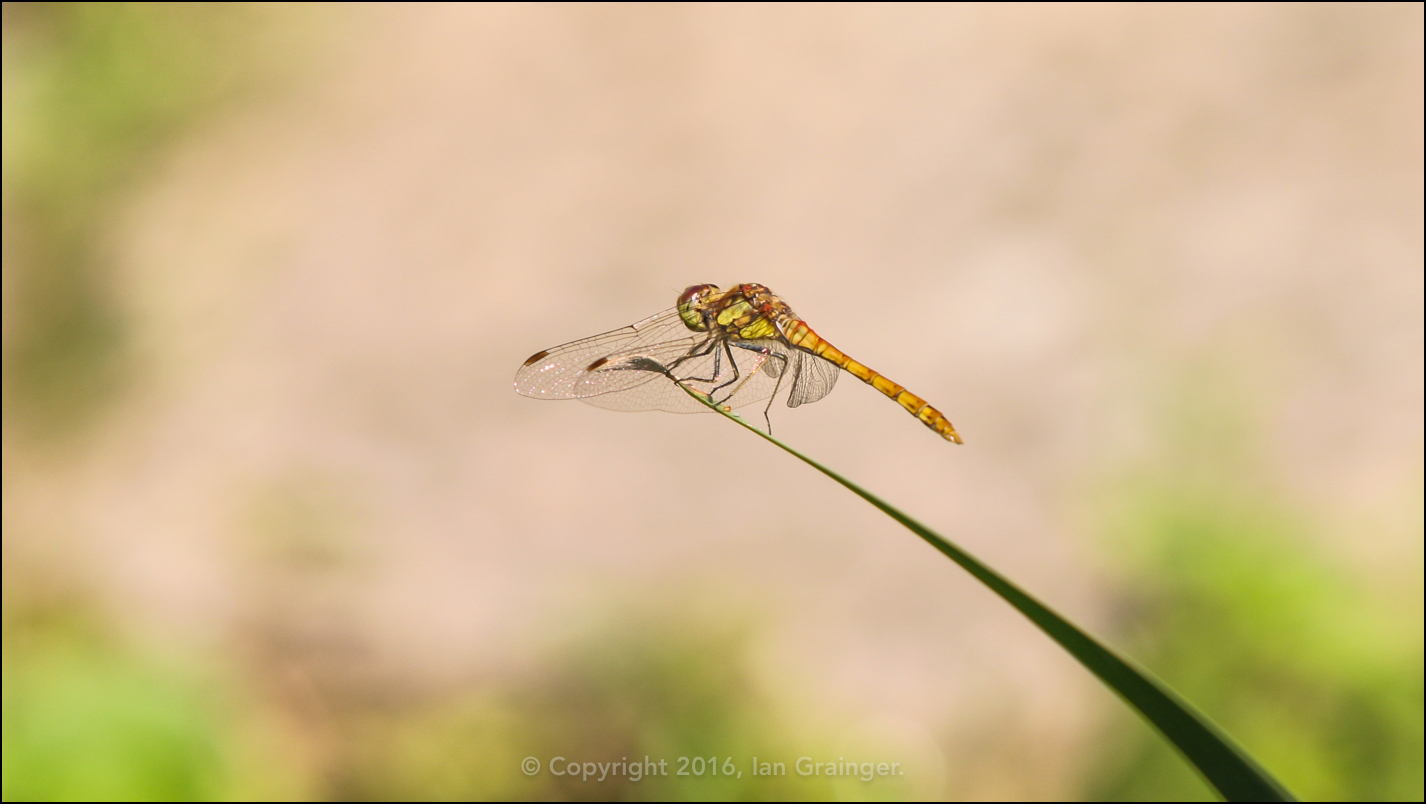
Dragonflies and damselflies can usually be found clinging to reeds and long grasses. If you're lucky, you might even find one covered in dew.
Most butterflies like to hang out almost anywhere they can be exposed to full sun, usually near a source of pollen.
Anywhere you can find wild flowers or native flowers growing, you'll undoubtedly find a hive of insect activity.
There's no better place to start looking for subjects than your back garden or local park, although more species will probably be accessible at your local nature reserve.
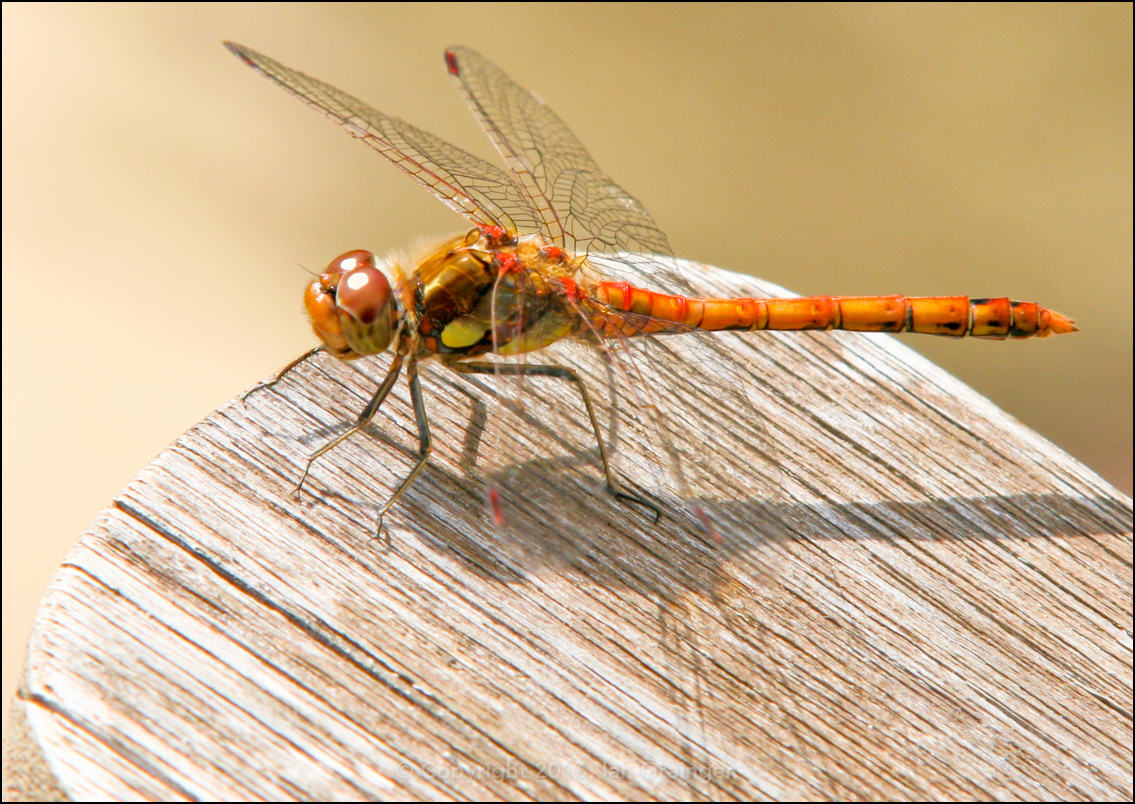
Please take a seat, I'll be with you in one moment...
Stalking Your Prey
Once you've found your subject, stalking it depends on what type of insect you're shooting. For instance, a ladybird will probably sit still until you get bored, whilst a butterfly will fly off before you get within five feet of it!
Probably the most important thing to remember is that whatever the insect, it's trying to warm up or it's feeding, so interrupting it will probably lead to it moving. This definitely means that you won't want to cast your shadow over the insect, for all it knows, you could be a predator, or at best, you're obscuring the source of heat. Most butterflies are particularly sensitive to shadows, and will dart off immediately if one is detected.
The next most important, yet obvious thing to remember is that insects are small. This means that even the slightest vibration to us is like a major earthquake to them. Be very careful when approaching them not to brush a flower petal, grass stalk, or a branch that is adjacent to them, or they'll be gone in an instant - and obviously, don't go running up to them, or they'll think the Hulk is arriving! Slow and deliberate is definitely the way to go.
It's worth remembering that dragonflies and damselflies like to return to a familiar vantage point, so if you see one sat surveying its surroundings, don't be put off if it leaves before you get a shot. Be patient and wait for a few minutes and you may be rewarded when it returns to the exact same spot!
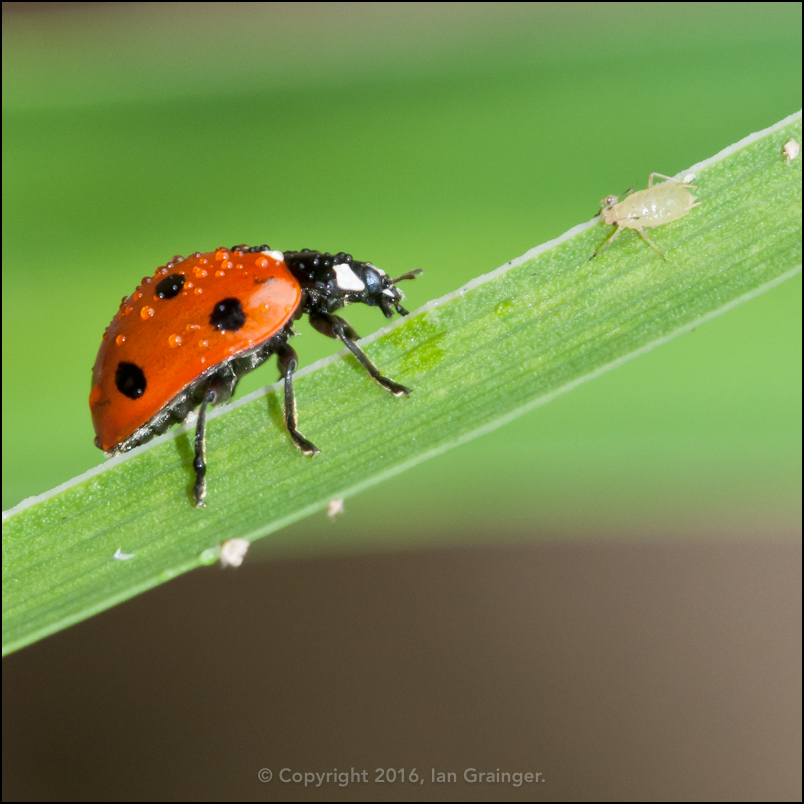
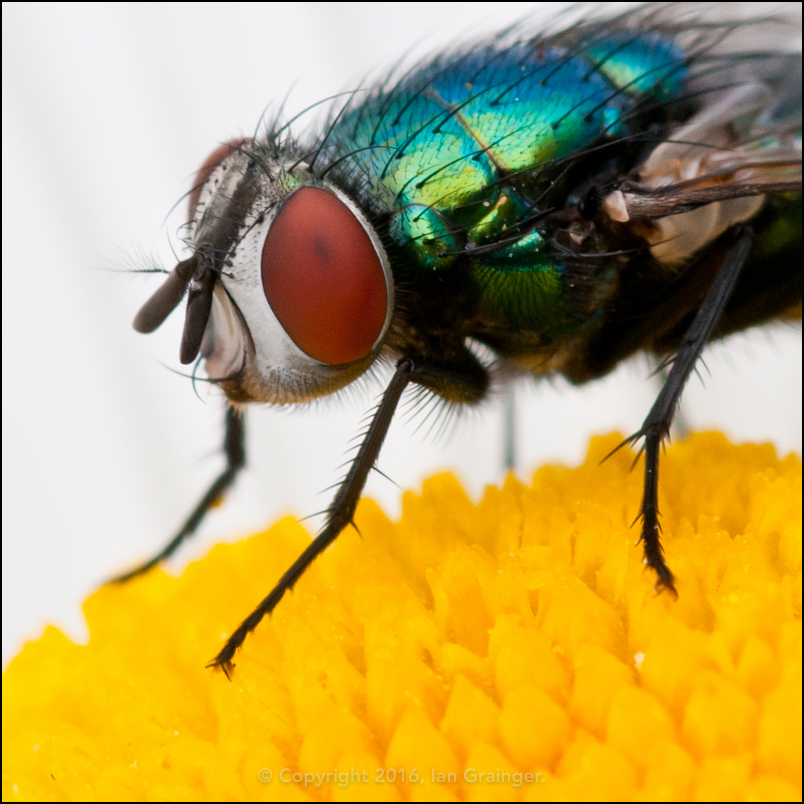
Must shoot, I'm just about to grab a bite to eat...
Camera and Set-up
I shoot using a DSLR, a Nikon D800 sporting a 36MP sensor, which also has excellent noise handling capabilities at high ISO. That's not to say that you can't capture good insect macro images with a Compact, or a Bridge camera, or even a Cameraphone, but a DSLR is definitely the best piece of kit for the job.
I like to shoot at ISO 800 or less, with an aperture set between f/8 and f/10. When working in close, this aperture range will usually give sufficient depth of field to get the subject in focus, and also let enough light into the lens to avoid blurry images due to camera shake.
I also like to work exclusively in aperture priority mode when shooting insect macros. This allows me to fix the aperture and let the camera pick the shutter speed. If I spot the shutter speed is too low, I can increase the ISO level, and retain the same aperture to ensure I shoot with enough depth of field to capture enough detail in the subject, while avoiding camera shake.
Nom, nom, nom, nom...
Lens Choice
A dedicated macro lens is my preferred lens for shooting insects. I use the excellent Nikon 105mm f/2.8 VR, which has the added advantage of vibration reduction technology.
The 105mm is a great focal length for shooting insects as it gives a comfortable shooting distance between the subject and the photographer. I've used a 60mm macro optic and found that it required getting in too close to the subject, hence there was more chance of my model fleeing.
Unfortunately, this is also the case when shooting with a Compact Camera set to Macro mode. The camera will need to be only a few centimetres away from the sitter, which usually sees them flee before a decent shot can be grabbed.
My experiences with other equipment can be seen in a following section.
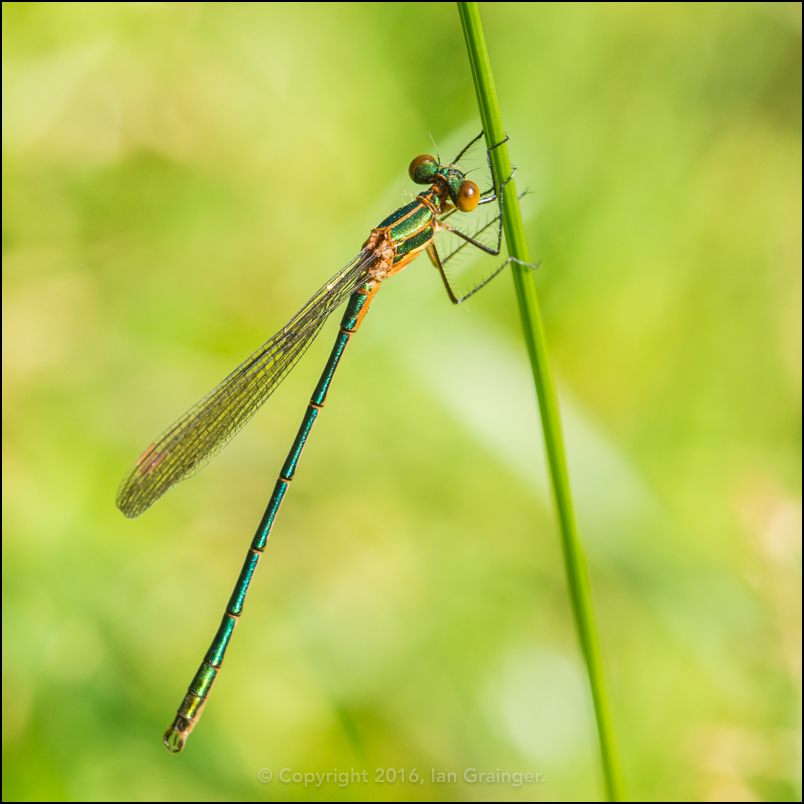
Don't you come any closer, or I'm off...
Technique
There are numerous techniques that can be employed when shooting insects, although I tend to prefer the two tried and tested methods outlined below.
Method 1
Set the camera to autofocus and carefully approach your subject. As you approach, take a few test shots, as although they are from further away, they may be suitable for cropping later, and you don't want to be telling tales of the one that got away!
As you get into position, carefully moving closer and closer, and still shooting as you go, try and keep an eye on your exposure details. As your frame fills with the insect, you'll find that there is less and less light to play with.
You may have to increase your ISO (or aperture size) to maintain a high enough shutter speed to avoid camera shake. This is where a lens with vibration reduction can help, or a camera that is capable of shooting at high ISO with low noise.
Even though you've engaged autofocus, you may still find that many of your shots turn out to be blurred, as the autofocus system can find it difficult to lock onto the subject in low light levels.
At this point, you may want to try switching to manual focus, and having a go at method 2.
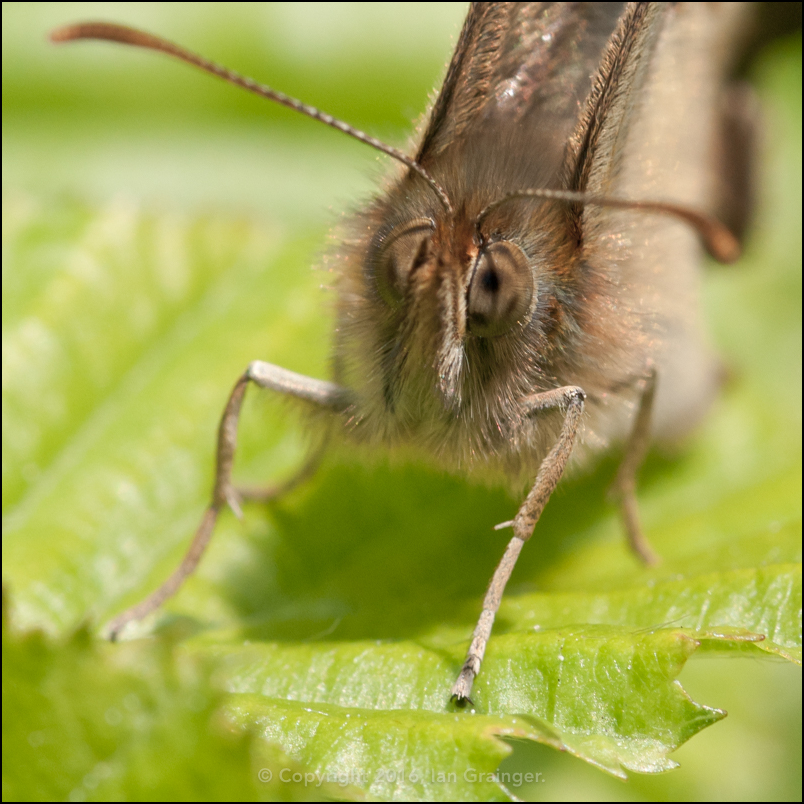
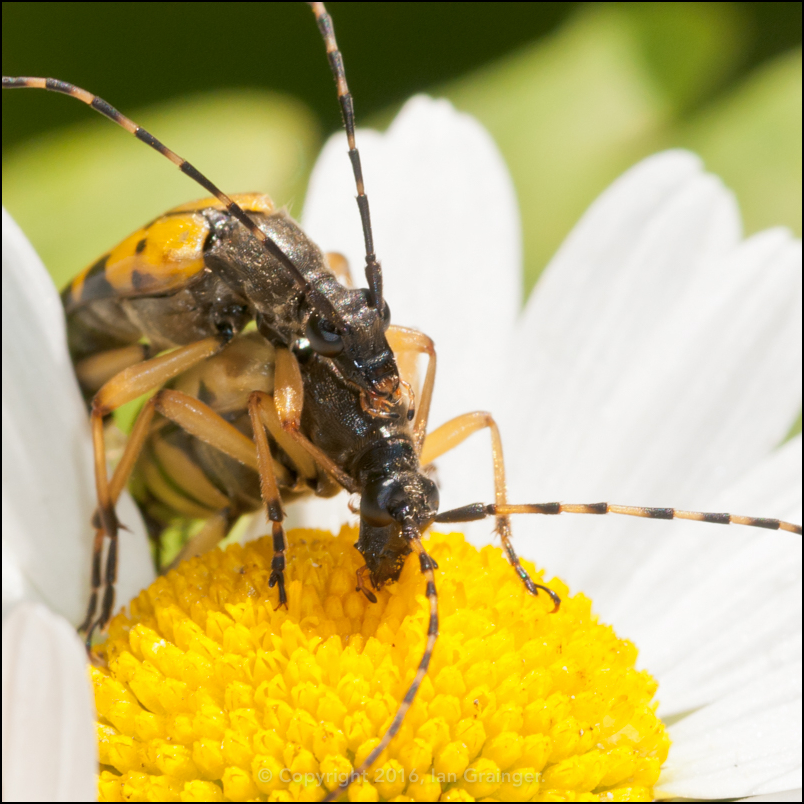
Oh bother, I haven't had time to brush my hair...
Method 2
This method is for when you've already reached the optimal distance from your subject.
The camera should be set to manual focus, and the subject brought into sharp focus in the viewfinder. Working at such close distances will mean that this will be tricky, but not impossible.
I've found that getting a firm footing, holding the camera in tight to my eye, setting an approximate focus, and then shooting off five or six frames in rapid succession as I sway slightly forwards and backwards can yield good results.
Obviously not all shots will be in focus using this method, but you're only after one!
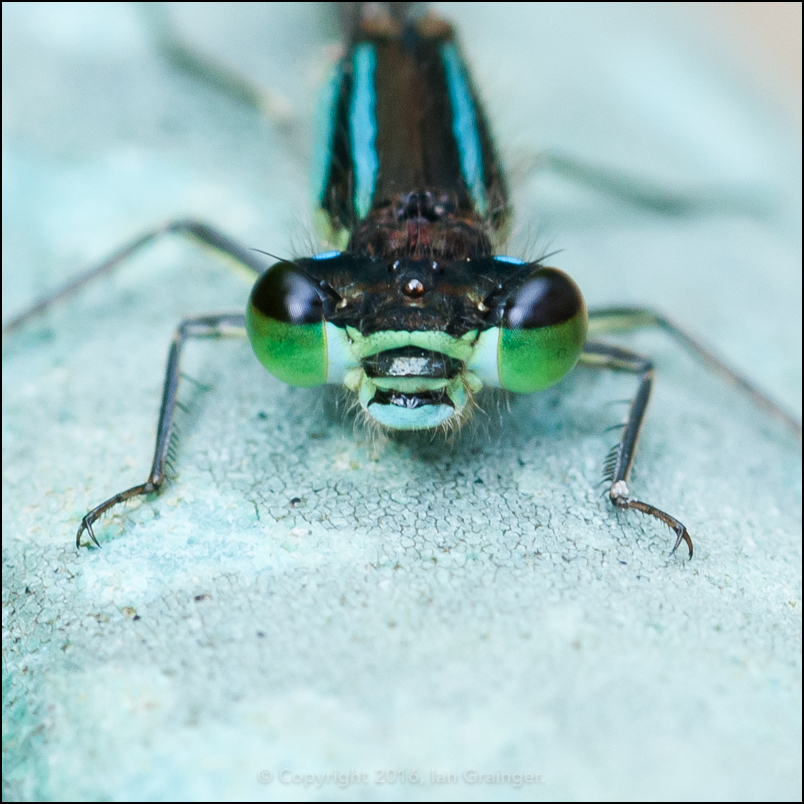
This *is* my best smile...
Cropping
If your camera is capable of capturing lots of detail, it may not matter that you can't get so close to your subject. With the multi megapixel sensors that cameras are equipped with nowadays, as long as you've captured a sharp image, it's quite possible to crop it down to something that is suitable for printing up to A4 size, or certainly for presenting on a web page.
Whilst I'm not a big fan of huge crops, they can certainly fuel the desire to get in even closer.
I think I'm going to sneeze...
Other Equipment
Extension Tubes
My experience with extension tubes for photographing insects has been abysmal! They are cumbersome, they reduce the amount of light that comes into the camera, and they drastically limit the depth of field.
I can't recommend them for this type of photography.
I'm ready for my close-up...
Close-up Filters
I started off using close-up filters on a Canon 50mm lens. They worked great, up to a point.
Close-up filters are usually not made out of the same quality of glass that a lens is made from, with most being made from plastic. This, has the effect of reducing the sharpness of the final image, whilst also reducing the amount of light that is getting into the camera.
They're a great way of getting into macro photography though, and I thoroughly recommend using them before you splash out on an expensive dedicated macro lens.
Can you hurry up please? My legs are getting longer holding this pose...
Reversing Rings
Unfortunately, I've not had the pleasure of using reversing rings.
For those that don't know, a reversing ring is a device that screws into the filter thread of a lens, and is used to mount a non-macro lens backwards, onto the camera body.
I've seen some great close-up work done using this technique, but can't comment on their suitability for photographing insects.
Err, should he be pointing that thing at us?
Ring Flash
A ring flash is a great addition to any macro photographers kit bag, although they tend to be on the expensive side!
The problem with using an on-camera flash for shooting insects (or any other type of macro work) is that because the lens is so close to the subject, it usually obscures any light that is coming from the flash, which is usually mounted on top of the camera. This resulting flash of light usually leaves a dark shadow over the subject area.
A ring flash is a flash that attaches to the end of the lens using the filter threads, so flashes directly onto the subject, thus removing those nasty shadows.
I've found that a ring flash can be a very useful device if shooting in low light conditions, like in the early morning when you're trying to catch those insects before they've mobilised, or at night, when you're out hunting moths!
Err, I don't think that's my best side...
Tripod
Whilst a tripod is probably the most essential piece of kit for the still life macro photographer, I've found one next to useless when photographing insects.
By the time you've moved the tripod into position, set the height and adjusted the angle, the insect will have undoubtedly moved - or fallen off its stalk due to boredom!
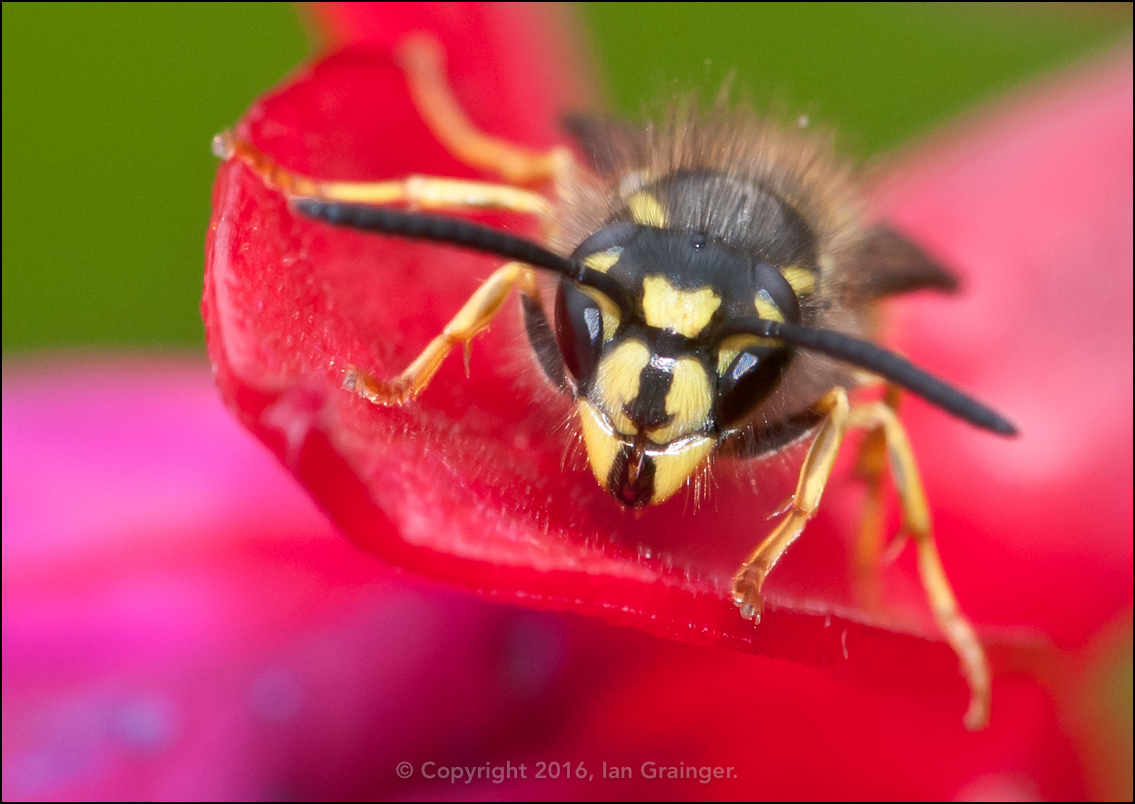
Now come a little closer, I'm not going to hurt you...
Conclusion
Taking photographs of insects is lots of fun!
It can be something that can be done in your own back garden.
It can be a bit hair raising at times, like when you're photographing things that can sting you, but if you hold your nerve, I'm sure you'll get the shot you want without being harmed!
I hope this information helps someone! Have fun, and happy shooting! :)